User Guide
Personal Signatures
XDOC has the ability for users to add their own personal signatures to documents, such as the 1003, which enables a truly digital mortgage process. Each signature is completely secure, as the user is only able to add their own signature. Signatures are added either by the user from the Viewer screen, or by the XDOC Administrator from an XDOC Admin screen.
Once the personal signature is added, adding that signature to a document is a simple process from the annotation section of the Document Viewer.
- Log in to XDOC
If logging into XDOC via the LOS and going to the Document Viewer, you will see the Home Icon. If you log in directly into XDOC without going through the LOS, you will see the User Icon on the upper right of the screen, which is the icon you want.
User Icon: ![]()
Home Icon: ![]()
-
If you see the Home Icon, click the Home Icon and the dashboard will appear, along with the User Icon at the top right of the screen. Click the User Icon. If you log in directly to the XDOC website and initially see the User Icon, click the User Icon
-
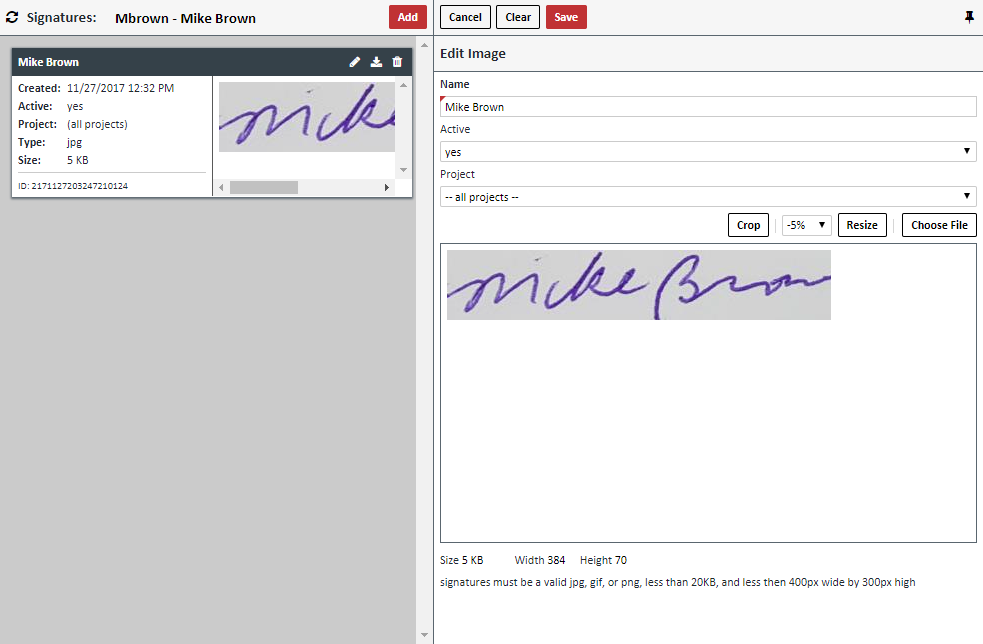
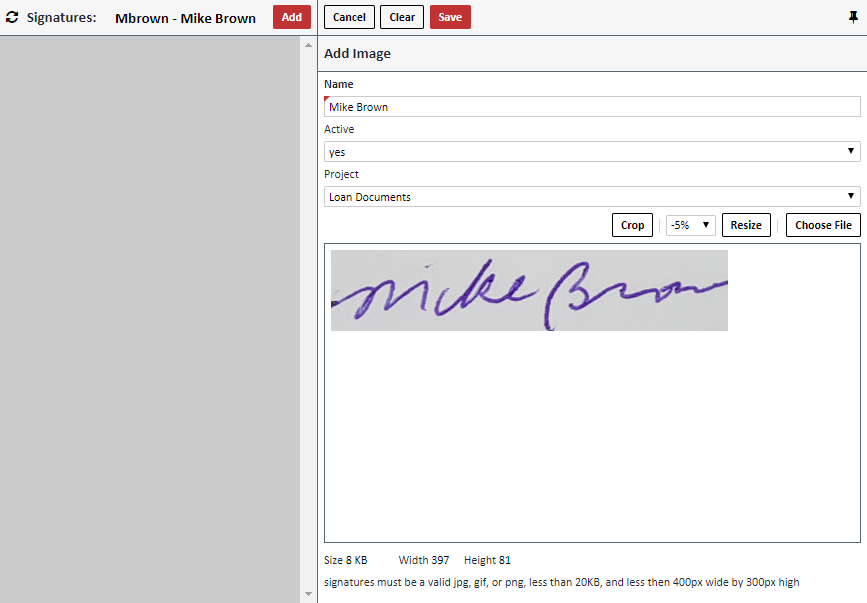
Click the Signatures Icon at the bottom and the following screen will appear
- Click the ADD button and the signature add fields will appear
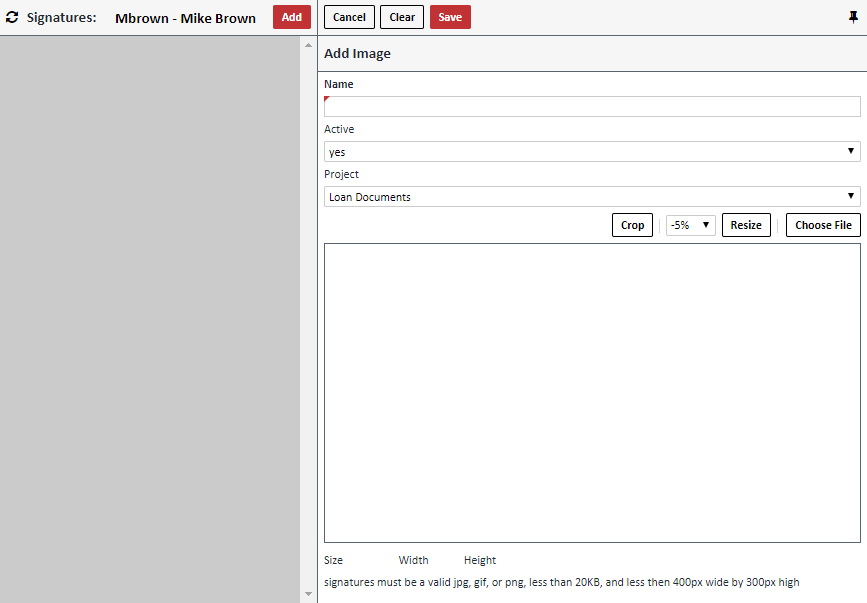
- Enter the following information:
- Name: The name for the signature
- Active: Set to “yes” to allow you to add this signature to documents
- Project: Set this to your “Loan Documents” project
-
Click Choose File to select the signature file. NOTE: all files must be valid jpg, gif, or png files, less than 20KB, and less than 400 pixels wide by 300 pixels high. If your signature file is larger than this, the fields at the bottom will appear in red and you will have the opportunity to resize the file.
-
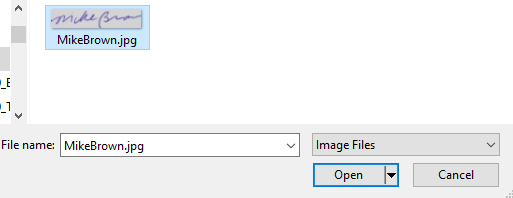
Choose the file, then click Open
- The file appears in the signature editing box and the size and height of the inserted signature file appear at the bottom
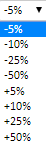
- If any sizes appear in red, this means the size is out of range and you must resize the image to conform to specifications. (20KB size, 400 pixels wide, 300 pixels high). You can resize the signature by clicking on the resize dropdown box to the left, choosing the amount of resizing, and then clicking the RESIZE button
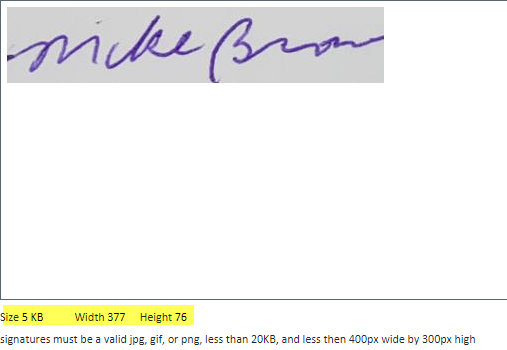
- The new dimensions will appear at the bottom. You must ensure that no dimensions appear in red or you will not be able to save the signature annotation.
- Alternately, you can also crop the signature to make it conform to the size limits. To crop the signature:
- Place the cursor in the signature box and crop it to the size you want
- Release the cursor
- Click the CROP button
- The signature will appear with the new sizes at the bottom

- When you are done editing the signature, click the SAVE button. The changes are saved to the left and you can now use this signature to sign documents.